|
|
Sagelight Saturation Technology
True-Color, Noise-Reduction Saturation Algorithms Developed just for Sagelight
|
Introduction
Saturation is one of the most important aspect of image editing. As such, it's worth getting right. Much of Sagelight 4.0 development was about color -- getting it right, making it as noise-free as possible, and generating the best results possible.
The result was a number of algorithms that did just that. Sagelight's Saturation algorithms can deliver true-color, less noise, and a deep, full color not available anywhere else.
Saturation in General
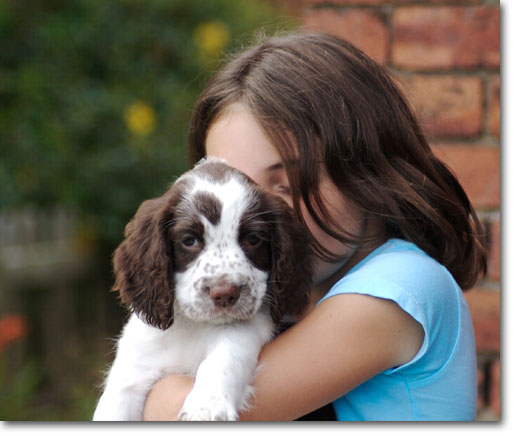
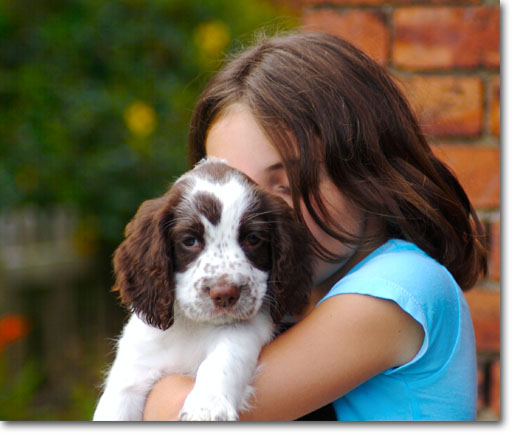
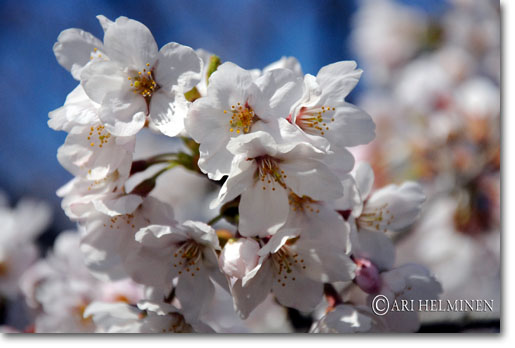
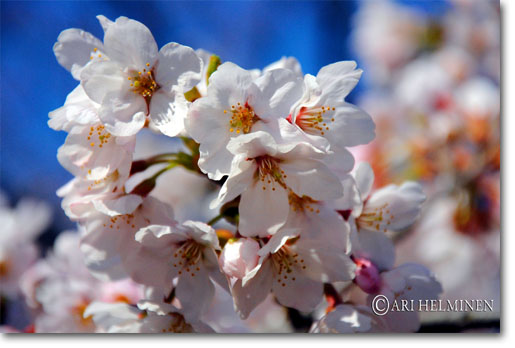
Saturation is responsible for adding color to your image. Sometimes adding just a little bit of color can make a difference:
Before & After Saturation Example (Image Credit: "Puppy Love" by smlp.co.uk)
|
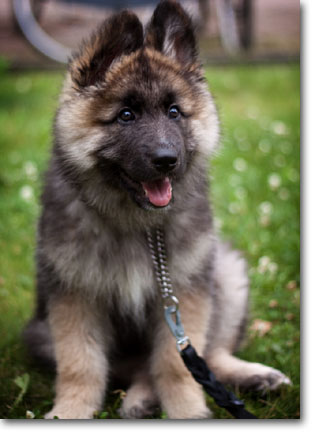
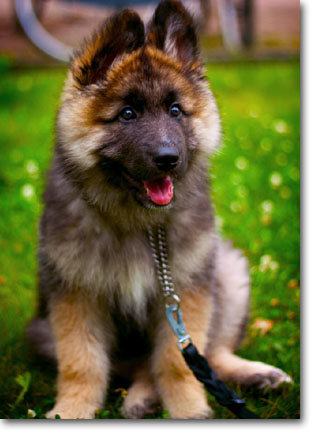
Sometimes adding a bit more color works well, too:
Before & After Saturation Example (Image Credit: aginorz)
|
Saturation can be very subjective. The idea of how much saturation to add varies from person to person and picture to picture. In the last two examples above, a lot of color was added. Sometimes this works better for a picture, where sometimes more subtle colors work better.
Sagelight saturation is designed to deliver deep, true color in multiple forms so you can choose what you want to do with your image. If you want a true, deep color, or a warm color, Sagelight Saturation methods have been designed around core fundamental principles of delivering sharp color with less noise.
Different Pictures, Different Saturation Types
If you've used other editors before, you may have noticed that there is a tendency for many images to go a little warm or yellowish as you add saturation. With a lot of pictures, this works out well since outdoor and portraits can use this warming effect. Other times, it's not so convenient.
Yellowing/Warming Examples
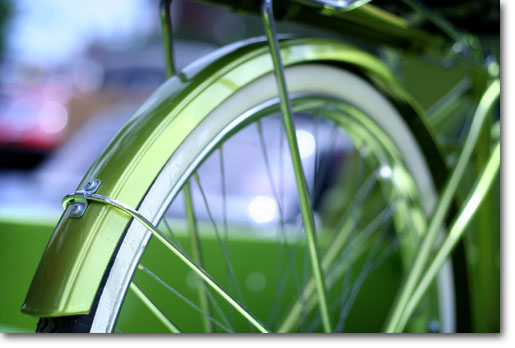
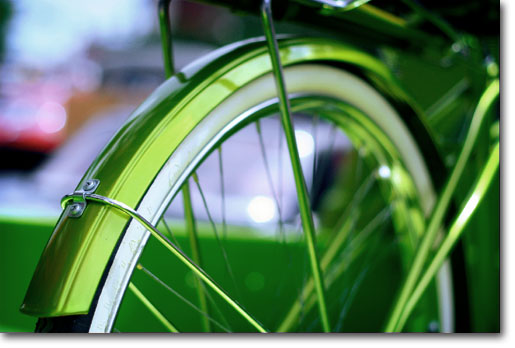
In this example
Sagelight Hybrid Saturation Before & After (Image Credit: "bike + truck" by ginnerobot)
|
the image is definitely warmer. In fact, it was toned a little further after it the Sagelight Saturation was added because it works will for this picture.
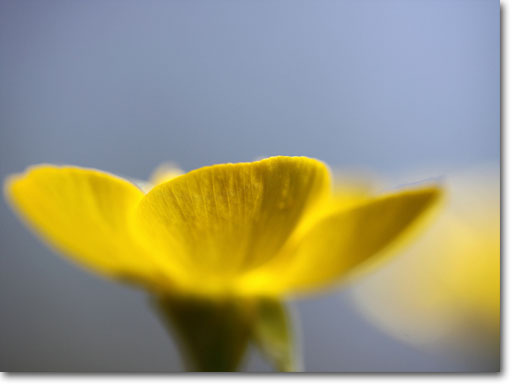
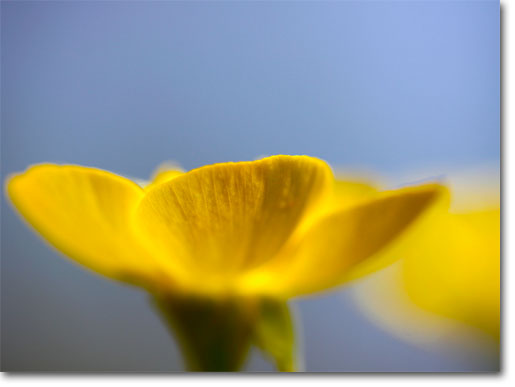
In the following example, no alterations were made to the original except to add the saturation:
|
Sagelight True Color Saturation
|
This is a case where the natural yellowing/warming of traditional saturation methods don't always work well. With Sagelight's True-Color Saturation, the color stayed much more faithful to the orginal color.
Multiple Saturation Algorithms
Of course, if you want to generate the yellowish picture above, Sagelight offers this with various Saturation Modes. Since Saturation in an important part of your image, Sagelight offers XYZ, C*I*E LAB, Hunter LAB, YCrCb, HSL, HSB, as well as Sagelight Saturation Algorithms.
Sagelight Saturation Algorithms
As mentioned above, much of Sagelight 4.0 development went into working with color because, as images vary, one saturation will work better for one image, while another algorithm will work better for another.
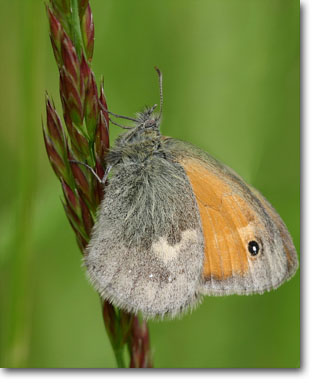
Three different saturation algorithms were developed for Sagelight to add color to images that answer some of the traditional problems with saturation.
Sagelight Saturation Before & After (Image Credit: "Le Procris (Coenonympha pamphilus)" by didier.bier)
|
Sagelight Saturation and Sagelight Vibrance were created from a color space developed for Sagelight. This color space provides a very accurate color presentation (where other methods shift the color) as well as keeping the image clean. Sagelight Saturation provides a nice, deep saturation to add color to your image without causing the glare or color blow-out that can occur as you add color to your image.
Sagelight Vibrance in a superset of Sagelight Saturation, and can be read about here:
Sagelight Vibrance
|
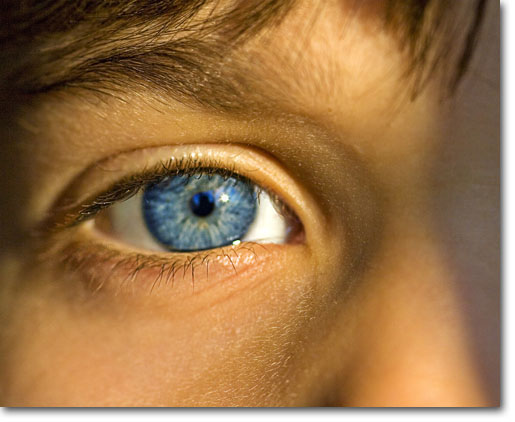
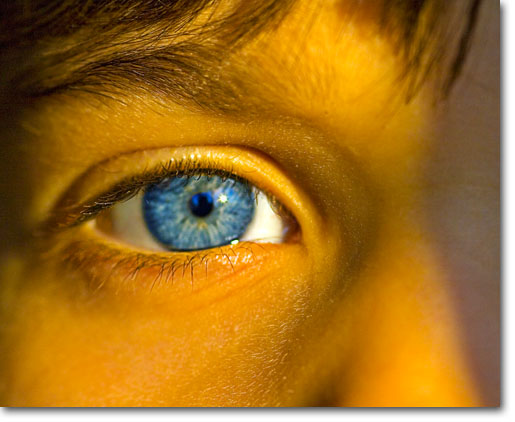
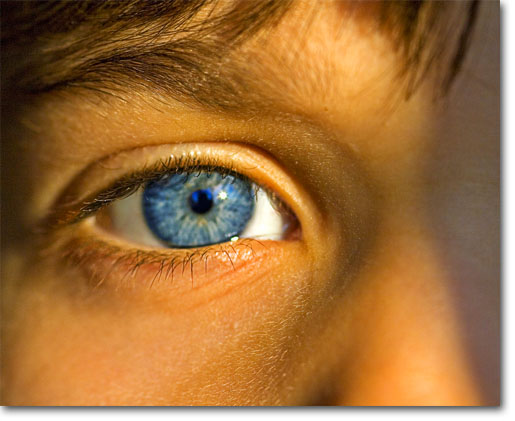
Original Image
|
Traditional HSL Saturation (approx)
|
Sagelight True Color Saturation
|
|
Original Image
|
Traditional HSL Saturation (approx)
|
Sagelight True Color Saturation
|
Sagelight's True Color Saturation answers the problems found in traditional HSL saturation. HSL saturation is a great saturation method because it stays true to the original color and can also add deep, rich color. Unfortunately, it also adds noise and a neon-like effect to many images.
Sagelight's Luminance Protect algorithm solves this issue and when combine to traditional HSL saturation, the qualities of HSL saturation are retained while the drawbacks are removed. Sagelight's True Color Saturation is a great choice many image types, including portraits (for portraits, also try the C*I*E LAB saturation)
Sagelight's Hybrid Saturation is a saturation method that is a hybrid of Sagelight Saturation and LAB-based saturation. It delivers the nice warming saturation effect while also deepening colors. It is often a great choice when the warming effect works well for your image. Unlike other C*I*E-based saturation methods, Sagelight Hybrid saturation won't turn the image artificially yellow.
Sagelight's High Saturation Range
As mentioned above, different saturation methods work better for different images. One of the issues with saturation can be range. Some saturation methods work better with some colors than others. For example, HSL saturation can completely ignore certain blue tones, where other methods will turn green to a yellow.
One of the color elements worked on with Sagelight's saturation technology is the issue of range. For example, consider the following image:
|
Lightroom Saturation (100%)
|
|
Sagelight Saturation (not 100%)
|
In the above example, the Sagelight saturation image has much more range, where the other example was limited by the one and only saturation method provided. You might not always want to add that much color to an image, but its nice to know that you can.