|
|
Sagelight Color Spinner Technology
An Improvement over Traditional Tint and Temperature
|
Introduction
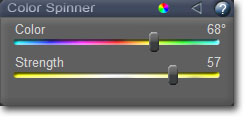
The Color Spinner allows you to set a tone for your picture by selecting the color for the tone and the strength, making the process much easier and more accurate over using traditional Tint and Temperature controls. Tint and Temperature are also not very accurate, which can cause your image to be harder to work with. See the examples below.
An Advance over Tint and Temperature
The idea of tint and temperature goes back to the advent of color television. New television color signals needed to be compatible with the black-and-white signal. So, a color model that splits the light from the color was used. The colors were split into an A and B channel, or a U and V channel. You may have heard this referred to as YUV, LAB, or YCrCb.
For the idea of tint and temperature, they are equivalent -- the Y or L channel is the same black-and-white signal that any television can pick up, and the A/B (or U/V) channels are the color channels.
Tint on Your television and On Your Computer Screen
The tint control on your television simply adjusted on of these channels. The subsequent idea of temperature, in effect, adjusts the other channel. While the methodologies may be different today (some Tint and Temperatures methods work in RGB space), the idea is the same and is a legacy from the earlier days of television.
Tint and Temperature is not Intuitive
When you adjust your image with Tint and Temperature to form a tone or tint for your image, you have two color channels that aren't very intuitive being adjusted separately. This is because they have been inherited from a color model invented long ago for a very different purpose that does not translate well to our color sense as people.
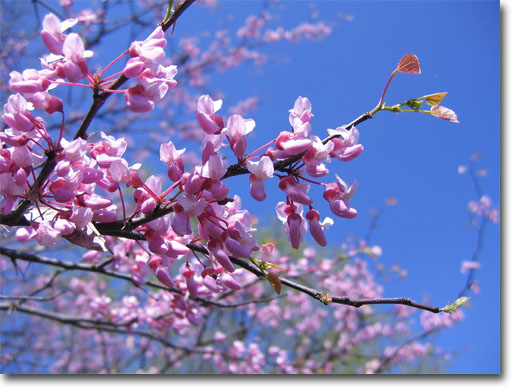
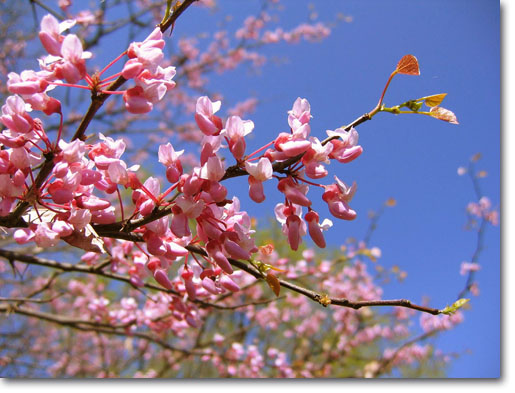
Original Image (Image Credit: "Spring Colors" by geodesic)
For example, consider the above image. It's a little blue, and it can use a tone in the yellow (i.e. warm) direction to make it look more colorful and natural.
Tint and Temperature Version
With Tint and Temperature, here is what it can look like:
Definitely not an intuitive sense of what will happen to the image. Here is the result, toned a little yellow to warm the image:
The picture is now also a little washed out -- the tint and temperature controls caused the picture to gain a lot of brightness, which particularly affected the brighter areas on the blossoms.
Sagelight Color Spinner Version
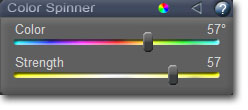
With the Color Spinner, you can just select the tone you want and a strength for that tone.
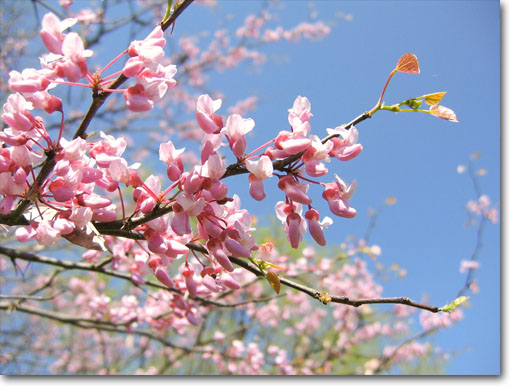
Here is the result with Sagelight:
Note that the image has the same light as the original image and did not wash out. More about this in the next section.
Easily Adjusting the Result with the Color Spinner
If we want to adjust the result by making the tone deeper, there is no way to effectively do this in Tint and Temperature except to move both controls around and hunt for a deeper color. The problem is that you must move through a number of different color tones before you find what you want, which causes you to become distracted from the original result, and you can't compare the results directly.
There is no way to show an example of this with Tint and Temperature here, because the tint and temperature controls aren't clear enough to show the different in a logical, straightforward manner.
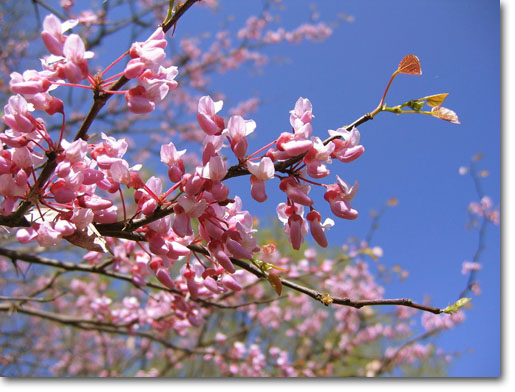
However, with Sagelight, if we want to adjust the result to increase to deepen the color tone, the Strength Slider can be simple increased:
With the Sagelight Color Spinner, the increase in the Strength Slider is reflected directly by the increase in tone in the image. It's a discreet change, but the image has a more definite warm cast to it than the previous image. With just a small slider movement, minor or major realtime changes can be made in the color direction and/or strength.
Similarly, if we wanted to adjust the tone to be a little bit warmer or more cool, the Color Slider can be moved to do this directly, again without hunting around and losing focus for the tone chosen.
Using Other Controls
Since we've been able to get a tone we like, we can also perform other functions, such as adding saturation. Since Sagelight works with multiple layers, we can adjust the saturation and the Color Spinner at the same time to get exactly what we want. For example, as we add saturation, if the color becomes too yellowish or any other color, we can just move the Color Spinner Sliders to adjust -- again, at an intuitive level. In this case, if we just increase the saturation, we get the following image.
Image after adding a small amount of saturation in Sagelight.
Color Spinner Maintains the Light
As was shown in the above picture, the Color Spinner maintained the light which allowed the image to be improved upon by adding saturation as well as other features, where the Tint and Temperature version caused some brightness in the image that also washed it out. The Color Spinner added a nice, deep tone to the image that we could further add some color to.
To explore another example, this time a black-and-white image so the effect can be seen more clearly:
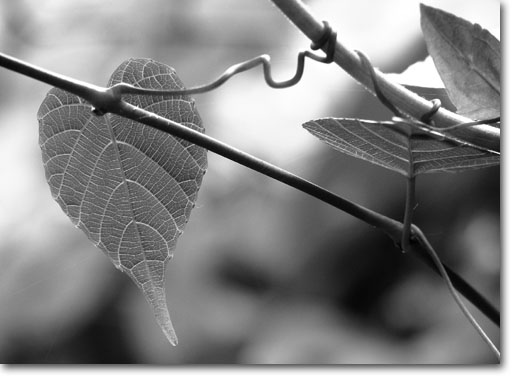
Original Image (Image Credit: "Fresh Monsoon Colors" by wildxplorer)
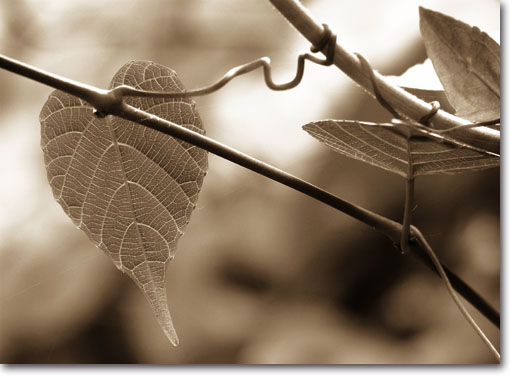
Sagelight Color Spinner Version
In this image, some color is being added to tone the black-and-white image.
This is the result of using the Color Spinner in Sagelight.
Tint and Temperature Version
If we use the Tint and Temperature method, again we need to form a tone that is not very intuitive by moving two sliders in various directions until we get the tone we want:
This is the result of using Tint and Temperature. The image comes out much brighter, which results in less ability to work with the image. Also note the colors starting to burn out near the edges of the white areas.
Getting the Same Result with Sagelight (if you want to)
In some cases, it is nice to brighten the image. The above image doesn't look bad, per se, but it is just not good behavior to brighten the image so much when you're just trying to tone it with a certain color.
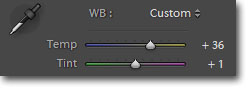
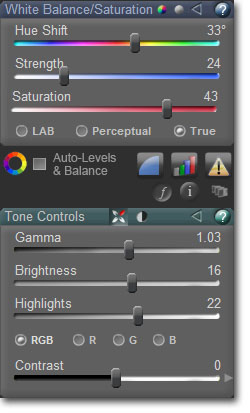
In Sagelight, if we wanted to get the above image, for example, we can use some controls in the Pro Quick Edit Mode, namely the White Balance Controls -- which work similar to the Color Spinner -- as well as some Tone Controls to brighten up the image -- that is, to brighten it to what we want to do on purpose, which in this case is to make it look like the result from the Tint and Temperature image as an exercise
These are the controls as set in the Pro Quick Edit Mode In Sagelight
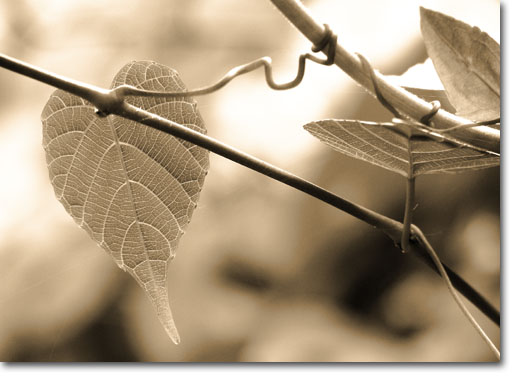
Image After using Sagelight, to emulate the Tint and Temperature Brightness Increase
The controls result in basically the same image we obtained by using the Tint and Temperature controls, showing that the Color Spinner in combination with other Sagelight tools give you much more control over your image than traditional, more old-school methods.
Conclusion
Sagelight's Color Spinner offers a distinct technological improvement over the traditional Tint and Temperature controls seen in most editors. The Color Spinner is much more intuitive, allowing you to set a color and a strength for the color in order to tone your image. By contrast, Tint and Temperature controls use a method that is a legacy of color television signals that consists of two non-intuitive color bands to form a color that you must hunt for rather than specifying the color that you want. Also, to increase or decrease the resultant tone in Tint and Temperature can be very difficult and cause you to lose focus on your image because you must move through other hues to get a deeper or lighter version of the tone you selected.
While the Color Spinner keeps the light steady as you add color, resulting in a nice deep toning (rather than a 'tint'), the Tint and Temperature controls can cause your image to become brighter and wash out the image, which makes the image more difficult to work with and to continue to edit. Sagelight's Color Spinner works with many other controls simultaneously so that you can work with many functions at the same time and change the result in realtime to get much more from your image.