|
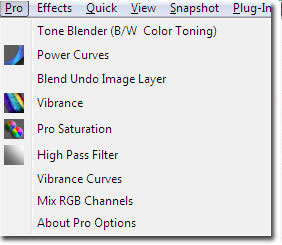
Sagelight Pro Menu Functions
The Pro Menu Functions menu list is a set of functions that are typically for advanced users, and are among a number of other functions available only in the upcoming Pro Version of Sagelight.
Sagelight has a very powerful and fast mathematical engine, and most of Sagelight's functions take advantage of it one way or another.
There are certain functions, such as the ones contained in the Pro Menu items list that use a high level of functionality from Sagelight's engine, or provide functions that are of a very high level and extremely useful if you know the concepts behind them.
A brief description of each sections follows. Press the '?' button in each section for more information.
Tone Blender (B/W & Color Toning)
The Tone Blender allows you to use various blending modes, such as Mixture, Soft Light, Hard Light, Vivid, etc., to blend color tones into your image.
General Features
-
60 + presets. Presets ranging from simple duotones/color tones to partially toned images, allow you to find a great starting place and continue from there.
-
Vignetting. Vignetting feature allows you to add a vignette to the result image, which can also be moved with the mouse
-
Profiles. You can load/save profiles for later used.
Advanced Features
-
Advanced blend types. Soft Light, Hard Light, Vivid, Multiply, Screen, Color Dodge, etc.
-
Different modes can be viewed interactively (vs. a pull-down menu)
-
Vignette modes. Vignette modes such as normal mixture, Linear, Color Burn, and Hard Light, allow for various Vignetting effects
-
Vignette Control. By controlling the radius, softness, and transparency of the vignette, the burn modes can create advanced color toning effects.
-
Pre-Desaturation. C*I*E LAB pre-desaturation desaturates the image to any level from 0 (full color) to 100% (C*I*E LAB gray).
-
Post-Saturation. Sagelight RGB post-saturation model (C*I*E LAB / RGB mixture) allows for post saturation of the result image + vibrance control for deeper saturation or lighter desaturation
-
Keep Luminance. "Keep Luminance" feature keeps the same light level of the original image. Sagelight's "Luminance Protect" feature is used for very accurate rendering with essentially no light loss.
-
Layer Thumbnails. Layer Thumbnails allow you to see the individual layers before they are blended. You can press on each thumbnail to see the unblended image in the Image View Window.
-
Switch Layer Order. You can switch the layer order for different blending effects.
-
Blend Strength. A blend strength factor is used instead of an opacity/transparency level. This provides much greater control. For example, rather than blending a burned-out image (i.e. through a harsh mode like Vivid or Hard Light), a strength is used on the blend. The prevents pale areas of the image when an original is mixed with a fully-blended image with blown-out highlights and shadows.
-
Curves Box. You can open the curves box to control all channels of the merge layer.
-
Color Blending Controls. From simple to more complex, you can blend a single color in any mode, or use the more advanced controls to blend two tones, in the highlights and shadows.
-
Vignette Color. You can use the interactive RGB color selection box to set a color for the vignette. This works well for creating white vignettes, but also mixing various colors for harshness or to generally tone, especially with harsher vignette modes such as Color Burn or Hard Light.
Power Curves
The Power Curves is a powerful set of tools that allow you to control the tone of the image through curves. Far from just a general curves box, the Power Curves is highly advanced, both in is ability to work with various color spaces, but in its user-interface to make using curves a much faster and more painless process than before. By allowing better and faster selection of curves without a pull-down menu, as well as the Chroma Channel, the Power Curves makes using curves much more useful and powerful than before.
General Features
-
Multiple Color Spaces. Allows curves to be used in 12 different color spaces, such as RGB, C*I*E LAB, etc.
-
Easy & Advanced Masking. Masking features operate on certain areas only, or to exclude areas.
-
Skin Tone avoidance.
Advanced Features
-
12 Color Spaces: RGB, C*I*E LAB, Hunter LAB, YCrCb, XYZ, HSB/HSV, HSL, LCH RGB, LCH, C*I*E, LCH Hunter LAB, LCH YCrCb, LCH Yxy
-
LCH in RGB, C*I*E LAB, Hunter, YCrCb, and YXY Color Spaces. This allows direct comparison of curves from color space to color space. You can just switch from one color space to the other to see the difference, where in other modes the curves are not 1:1
-
Chroma Channel in RGB, XYZ, and other color spaces. Traditionally, curves have only been useful to a point. This is because the desire to decrease or increase the saturation comes along with curves. Sagelight Power Curves offers the Chroma Channel on spaces where it is useful, such as RGB, XYZ, and C*I*E LAB. This makes using curves much more convenient.
-
Sagelight RGB Saturation. The chroma channel on the RGBC space uses Sagelight Saturation, which is a very high-level perceptual saturation.
-
Chroma Multiply Slider. One of the limitations of curves is that the curve space is from 0.0 to 1.0 (or .9999). Normally this is all you want, but not so with the Chroma Channel. Sometimes you want to go above 1.0 for various reasons, since 1.0 is not always fully saturated, depending on the situation. The Chroma Multiply slider allows you to directly multiply the value of the curve setting, up to 5.0. This allows a deeper and more stark saturation where it would otherwise not be possible.
-
Advanced and Easy Curve Selection. To make using curves much more useful, the curve channel can just be grabbed in the main curve box. The background channels are displaying (this is can be turned off) behind the active curve -- you can simply move the mouse to the curve channel and selected it. This makes using curve much simpler and much faster, rather than losing focus on the workflow to select a channel from another control box area. You can also select the channel from a control box (non-pull-down menu) in cases where the background curve channel is not isolated enough to select with the mouse.
-
Expandable Curves Box. The curves box can be sized with the mouse. Not a seriously advanced feature, but a nice-to-have.
-
Different Curve Types. In addition to the default Spline Curve type, you can also select a "soft Spline Curve" that is more symmetrical and useful in different areas, but also a linear set of point-to-point lines, which is very helpful in isolating tonal areas -- you can then switch the curve type back to a Spline type to avoid edges.
-
Set Gray Point in RGB, XYZ, and LAB Color Spaces. You can set the gray point of the image in various color spaces. This allows for great image balancing, especially in XYZ and LAB modes.
-
Auto Levels in RGB and XYZ Color Spaces. You can auto level the curves in RGB and XYZ space. Auto-leveling in XYZ space is often a better alternative to RGB space and can generate more neutral tones.
-
Real-time curve display. All blend modes are written in SSE2 and SSE4 code for real-time display, which also allows some of the more powerful functions to be more useful, such as the Sagelight RGB/perceptual saturation, which is a very intensive algorithm.
-
Point Selection from the Image. You can move the mouse on the image to see the point on the current curve channel or select it by clicking on the screen. Another nice-to-have feature rather than an advanced feature.
-
Advanced Masking. Advanced Masking supports LAB and LCH modes for great masking control. Also displays a masking box so you can see the selected areas, which you can also overlay onto the image.
Blend Undo Image Layer (General Image Blending)
Sagelight Image Blending allows you to blend the current layer and the layer in the history buffer (which can be selected from any state in the history buffer). All basic blending modes are offered (i.e. Mixture, Soft Light, Overlay, etc.), as well as some other modes.
Advanced Features
-
Blend Strength and Transparency. Where transparency allows you to mix the results of a full blend and the original image, the Strength factor allows you to set a blend strength on the actual blend. For example, if you blend with Vivid mode, this will often burn out the highlights and shadows, which can be a nice effect. However, if you were to merge this with a 50% transparency factor, this would merge burned out areas with the original image, but would not decrease the burned areas, leading to flat areas in the image. When using the strength factor (i.e. in this example, at 50%), this will set the blend formulaic strength to 50% so you can control how the areas in the image become burned out, making mixing with the original image of a much higher quality.
-
24 Blend Types, such as Soft Light, Hard Light, Vivid, Color Burn, Color Dodge, etc. These allow a lot of control over the image, especially some of the other modes discussed in the next couple sections.
-
Difference Map Mode. This will create a high-pass-style map from the differences between the two images. This sets the 0 point at .5 (i.e. 0x8000 on a scale of 0-0xFFFF) so you can use this blend later on with other modes such as Soft Light, Hard Light, etc. This is very useful with Gaussian Blur functions as well as other functions in Sagelight.
-
Hue, Saturation, and Luminance models. The Hue, Saturation and Luminance blending does not use HSL mode as some editors do. Rather, it uses either YXY, XYZ, or LAB space, depending on the blend type. The basic result is that an XYZ-mode base is used for much better color fidelity that is not found in HSL blending.
-
Sagelight RGB model Hue (Hue I). An XYZ-based Hue model is used for the blend type called "Hue II". With Hue I, this uses a very accurate Hue model to get the hue from the image without affecting the light or saturation. Even with XYZ and C*I*E LAB-based models, this is not possible. The XYZ/LAB-based version (Hue I) is included because it has certain elements that are useful.
-
Channel Type Output. In addition to blend types, you can control the output to affect the entire image, or just the color or luminance. This allows much more control over the result image.
-
Sagelight luminance Protect. On the Luminance-channel output, Sagelight's Luminance Protect model is used for very accurate rendering of the original light with essentially no light loss.
-
Layer Thumbnails. Layer thumbnails show you the original layers before blending. You can press on each thumbnail to see the original layer in the main image view window.
-
Curves on each layer. You can open up the curve box to change each layer. This is very useful for things like High Pass maps, but also just for general toning as you blend the images. See the section on the Power Curves to see the advanced features of the Sagelight Curves Box.
-
Switch Layer Order. You can switch the layer order with just one click, which makes blending that much easier.
-
Interactive Blending Mode switching. You can open the "Interactive" control pane to switch between modes very quickly. This is implemented to make it very easy to see the differences between each mode.
Vibrance
The Vibrance function features three vibrance modes as well as a number of controls to get some great effects from Vibrance and Saturation techniques. The Vibrance function in the Power Box is a subset of the features in the Vibrance sub-menu function. The Vibrance function/sub-menu has more controls and is more powerful.
Advanced Features
-
Three Vibrance Methods. Sagelight Vibrance, Stark Vibrance (C*I*E LAB-Based) and Soft Vibrance (LAB/RGB-based) are offered Vibrance mode. Each mode has its own usefulness, depending on what you want to do with your image.
-
Sagelight Vibrance. Sagelight Vibrance is an advance on traditional vibrance technology. As a superset of Sagelight Saturation (consistin of composite of C*I*E LAB and RGB color space), Sagelight Vibrance colors all ranges of colors (where traditional vibrance does not do well with certain tones, such as blue) and also deepens the color of the image with much less noise (vibrance, due to its natura algorithmically, tends to cause noise). Sagelight Saturation & Vibrance moves towards the original color, where traditional vibrance can tend to move into the yellow on some colors.
-
Strength and Fullness Sliders. These sliders, when used together, allow a maximum range of vibrance, from very heavy to a more stark look, focusing on certain colors.
-
Saturation Blend Slider. Vibrance can be overwhelming. Sagelight vibrance methods (in all three modes) offer the range from simple saturation to full-on vibrance. At the default 50%, the vibrance is very full and causes little noise. At 100%, the vibrance is very feep. Since Sagelight saturation saturates colors at a deep level, sometimes 100% saturation is the best option. The Saturation Blend Slider allows you to test each level easily to see visually and in real-time which position gives the best effect.
-
Pre-Desaturation. A technique in vibrance methods is to desaturate the image slightly before re-saturating. This can provide some great effects for your image.
-
Post-Saturation. Post-saturation works well for vibrance, as you can get a certain level of vibrance that looks fine but becomes too overwhelming at a certain point. The Post-saturation slider allows you to add pure saturation on top of the result. Also, you can use the same slider to desaturate the result for effect, or to turn the image to black-and-white. You can set this slider immediately and use the controls to control out the black-and-white image looks, the net effect being to control the weight of each tone as it is converted to black-and-white.
-
Simple and Advanced masking. Vibrance is a function that definitely benefits from masking. In many cases, you do not want to add vibrance to an entire range, but to to only parts of the picture, for effect. The masking allows you to avoid areas (like skin tones), or to select specific areas (like skies) to just focus on certain tonal/color areas.
Pro Saturation
Sagelight's Pro Saturation function gives you the ability to choose between 7 different saturation algorithms based on various color spaces. There are three saturation algorithms developed for Sagelight to bring out accurate color fidelity and deep color in your image.
In general, image editors use one type of saturation to add color to your image, either HSL (which causes noise), C*I*E XYZ/LAB (which goes warm and/or yellow), Hunter LAB (similarly goes warm/yellow, but not as much and is probably the best general saturation method between HSL, XYZ, LAB, and Hunter LAB), HSY, etc. Each algorithm has its various strengths and limitations. For example, HSL-based saturation can bring out great and accurate color in your image, but can cause noise and create neon-like effects. LAB is great for landscape, but where a warming effect works well, but is not necessarily the best method suited for other pictures.
Since adding color (i.e. saturation) is one of the primary things to do with an image, Sagelight takes it very seriously and offers various methods. Sagelight also automatically chooses between various methods in different functions within Sagelight to produce the best color.
Sagelight Pro Saturation allows you to see the different types of color you can add to your image and get the best effect for your particular image.
Advanced Features
-
7 Different Saturation Modes.
-
Sagelight Saturation. Sagelight Saturation is a very intense algorithm that provides accurate, deep color to your image. It has been developed to answer the problems posed by other, traditional saturation methods.
-
True Color Saturation. Sagelight's True Color Saturation is another method designed to deliver accurate color. Where Sagelight Saturation is designed to deliver deep color, True Color Saturation emphasizes very accurate color and light reproduction.
-
Sagelight's Hybrid Saturation. Similar to XYZ saturation, Hybrid Saturation also has a warming effect. It is presented in the Pro Saturation controls since it is used elsewhere in Sagelight. It is mostly for reference, and is used as an extremely fast high-quality saturation method around Sagelight's various functions.
-
Strength and Multiplier Sliders. As with the Power Curves, sometimes you want to exceed 100% on the saturation curve, but you also don't want to form a straight multiplier, either (i.e. New Saturation = Saturation*X). The Strength and Multiplier Sliders allow you to form the best saturation curve and multiplier combination for your image, based on the low-level mathematical principles inherent to saturation algorithms.
-
HSB Blend. This is an improvement on the HSB saturation. Typically, HSB saturation can form vibrance-like saturation, which can be a nice effect. However, with Sagelight's Luminance Protect technology, the HSB Blend slider provides a way to normalize the light which can provide the same vibrance-like saturation up to a nice deep, fully-qualified saturation with little noise.
-
Advanced Masking. As with the Vibrance function, masking with saturation is a great option, which allows you to select or avoid areas with powerful controls.
High Pass Filter
Sagelight provides a HIgh Pass Filter that can then be adjust with the Blend Undo Image Layer function.
The High Pass Filter is created with a high-quality Gaussian Blur function. The High Pass filter can be used to create great local contrast and sharpening effects by using different blending modes such as Soft Light, Overlay, etc.
Vibrance Curves
The Vibrance Curves in Sagelight are a new concept in Vibrance. With the Vibrance Curves, you can create some very tailored vibrance effects by controlling the curve on each channel, which is then passed through a vibrance function.
Since you can control the curves for each channel and tonal area, you can unevenly set add or remove vibrance & saturation to the image, which can be very useful and look more natural.
Advanced Features
-
Same advanced features as the Curve Box. Easy, rapid Curve Selection. Chroma channel is now the Vibrance channel.
-
Same advanced features as the Vibrance function. Pre-desaturation, post-saturation, pre-brightness, etc.
-
Total RGB tonal control. You can add great tone by using the curves in the same way you would in a normal RGB setting. But, since it is being passed through a vibrance filter, the color difference will bemore pronounce and deeper, yielding saturated colors without overflowing.
-
4 Vibrance Color Spaces. In addition to RGB (i.e. Sagelight Vibrance), C*I*E LAB, YCrCb, RGB Toner is also presented that has a different feedback for deeper color toning.
-
Advanced Masking. As with the Vibrance function, masking is very beneficial to vibrance functions to keep away from certain areas or to select areas.
Mix RGB Channels
The Mix RGB channels function allows you to mix RGB channels with each other. In of itself, not an advanced function to Sagelight, but the various options that allow you to keep the luminance, create a black-and-white image, give a wider range to the function.
Discussion Board
|
|