|
|
Sagelight Tone Curves
Creating powerful, automatic curves that also protect your image
|
Manual Curves vs. Tone Adjustment Sliders
Curves can be very helpful to your image. Traditional manual curves take a form similar to this image:
This type of curve -- representing traditional curves -- can be fairly difficult to use, but such curves can also be a very powerful tool to use when editing your image.
Manual curves, such as in the above example, are typically considered an advanced toolset. For example, Photoshop elements does not have manual curves in their function list.
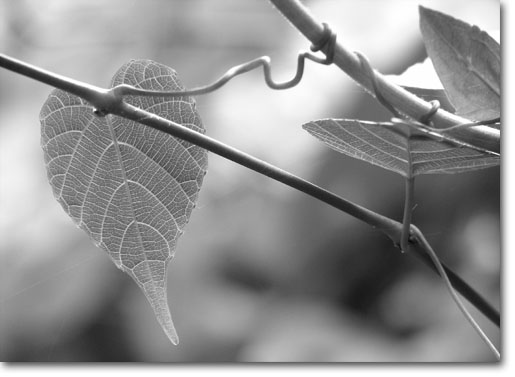
The following image was created by using the Sagelight Tone Sliders rather than manual curves:
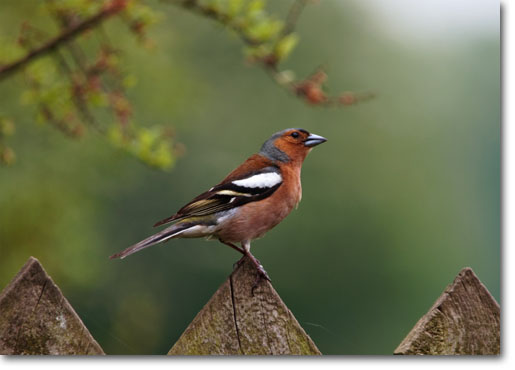
Original Image (Image Credit: Aih.)
|
|
|
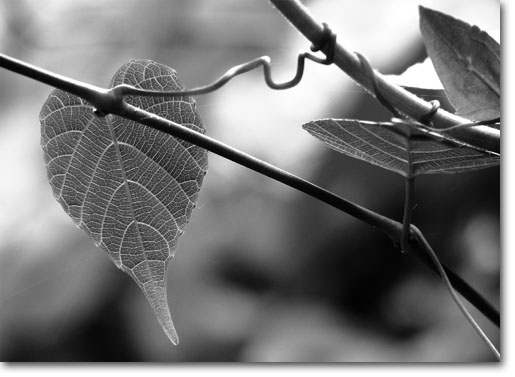
Image After using Sagelight Tone Curve Sliders
|
|
|
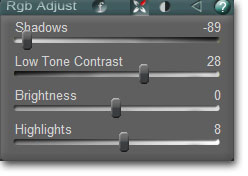
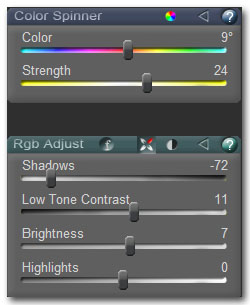
By simple setting just a few sliders, multiple curves were performed changing in realtime:
Realtime Tone Curve Sliders used for Above Result
As noted below, the curves form a mulitple-curve composite impossible to obtain with normal curves. Also, every slider movement is in realtime so you can see what is being generated instantly as you move the slider.
Sagelight Tone Curve Sliders
Sagelight's Tone Curve Sliders not only makes manual curves unnecessary (though still useful, see this section), but also creates powerful curve sets with simple slider movements that cannot be created with manual curves.
Since Sagelight's core engine is floating-point and fast SSE code, Sagelight can calculate dozens of simultaneous curves in realtime based on the movement of just a couple sliders.
Sagelight Tone Curve Technology
Sagelight's tone curves have been specifically designed and crafted over years of research to work together to create dramatic improvements to your image in a way that is typically superior to manual curves, as well as protecting your image's black-and-white points. This means that you can move different sliders to create different lighting effects in realtime without worrying about the shadows or highlights being lost.
More Powerful than Manual Curves
Sagelight's automatic Tone Curves can create a level of curves to help your image that cannot be obtained with traditional, manual curves.
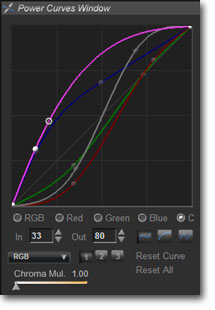
Sagelight's tone curves, such as these Tone Curve Controls:
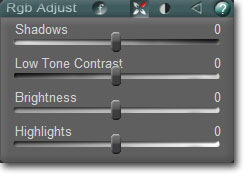
RGB/General Curve Controls
Each slider corresponds to one or more curve, compiled simultaneously with the other controls and curve sliders. The above sliders control the over tone of the image. Similarly:
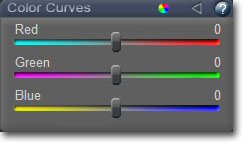
These curves control the individual colors, controlling the Red, Green, and Blue channels. The light is automatically adjust in most cases, so the general brightness of the image stays the same as you move the controls.
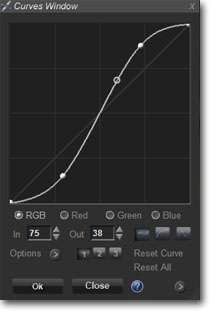
Using multiple Tone Curve sliders can create a functional and composite set of up to 25 different curve layers. If we consider a traditional curve, such as one simple curve:
Single Curve Example
this means that you would need 25 of these boxes up simultaneously to keep up with Sagelight's automatic tone curves and the subtle tones they can provide..
Why can Sagelight Tone Curves be Better than Manual Curves?
Manual curves can only go so far before the image starts to become too stressed by a single curve, which will show in the image become flat, too bright, or too shadowy. This is because you can only do so much with one curve, when multiple curves are required to keep the image integrity.
In a manual setting, this means performing one curve, then another, and then another.
With Sagelights automatic tone curves, this is handled for you by applying the layers and functional components of the curves on top of each other, preventing the image problems that can happen with manual curves.
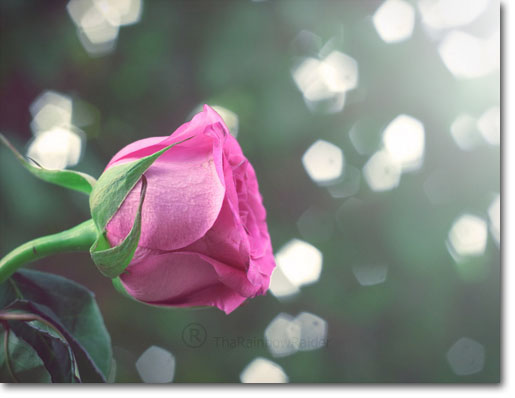
Original Image (Image Credit: "Fresh Monsoon Colors" by wildxplorer)
|
|
|
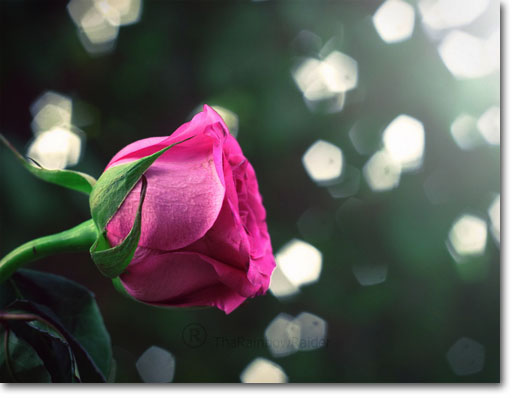
Image After using Sagelight Tone Curve Sliders
|
|
|
In this example, the following curve sliders were used:
Since three sliders were used, and multiple curves are generated for some curves, this is the equivalent of using about 5 curve boxes simultaneously. If we look at the composite curve generated for these settings, we see the following display:
Note how the curve looks uneven -- the curvature does not look completely smooth. This is because it is relating 3 different curve layers with 5 different curves applied to the image as if it were in one curve box. This shows how to perform this function with manual curves can be more difficult, because to get the subtlety shown in the curve composite is basically impossible with one set of curves. Therefore, the variances you see in the curve display starts to show how the quality would suffer in a one-curve, manual situation.
Can you Get This Result with Manual Curves?
The answer is yes and no, but mostly no. If you're familiar with using curves, you can come very close to this result with one curve, but typically using one curve will not achieve the same quality -- either the shadows will be too dark or there will be too much contrast. It may be possible to get the same image with one curve setting, but it would be difficult to duplicate and can be done in a fraction of the time with the Sagelight Curve Sliders.
Manual Curves offer more flexibility in certain areas, so it is possible to achieve these particular results in with two manual curve sessions, but you would have to know what you want to see beforehand, since you could not experiment with the result in realtime as you can with Sagelight Curves.
|
|
|
Image After using Sagelight Tone Curve Sliders
|
|
|
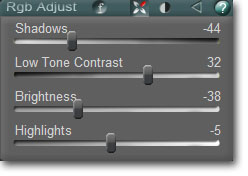
This example uses the general tone curves as well as the color toner curves:
Controls used for the above result
This example is more complicated as there are a number of curves being generated -- in this case, up to 10 or so for this image as Sagelight moves the RGB/Tone curves as set by the RGB Adjust controls, but also setting the curves for the Color Spinner and maintaining the light (the Color Spinner keeps the light steady, deferring to the RGB Adjust/Tone Controls).
If we look at the composite curve generation for each channel:
Composite Curve Generation for above result
The same variances can be seen in multiple (and automated), real-time curve sessions related as a single curve. As before, this shows how much work is going on behind the scenes and how this picture would be very difficult -- and probably impossible -- to achieve with one set of manual curves.
32-bit floating-point and Curve Generation
Automatic tone curves in Sagelight are performed in 32-bit floating point, and are often functions of each other, such as f(g(x)), which means the curve set can stay in 32-bit floating-point space without being converted back to integer space.
Also, the curves in Sagelight are specifically designed to work with other, so when you perform a Low Contrast Curve and then a Shadow Curve, these curves work together to create a tone in your image that would be difficult to perform with manual curves
Black and White Points: Preventing Image Damage
As mentioned earlier, Sagelight tone curves work to prevent your highlights from blowing out and your shadows merging together to complete blackness. This is because once you do this, you cannot recover the information very easily: it's lost in the image once the highlights overflow and shadows turn to black.
Sagelight curves are high-resolution and design to prevent this from happening. This protects your image and gives you much more to work with.
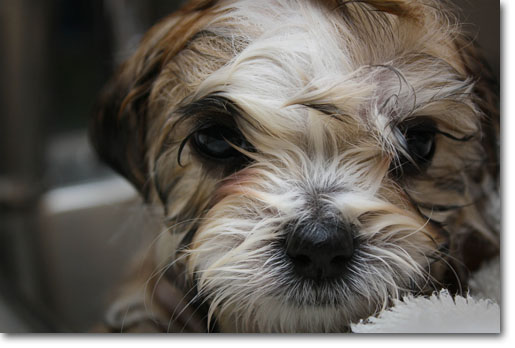
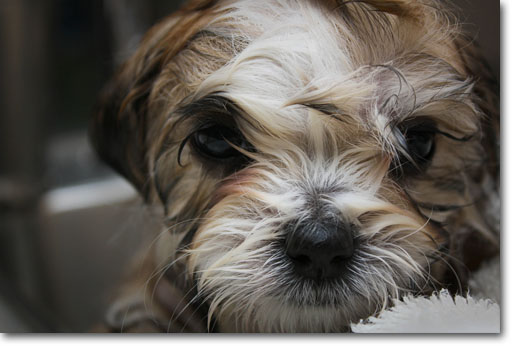
For example, let's look at this image:
Original Image (Image Credit: "Maltese-Shihtzu puppy after first bath" by wsilver) |
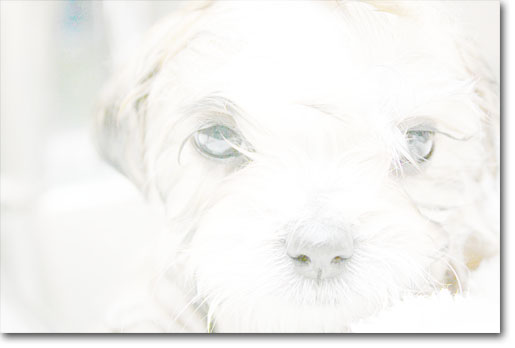
When the curve is move out to completely brighten the image, we get this image
|
Image Brightened with Sagelight Curves (with completely white areas)
|
It looks very bright, but Sagelight has protected the white points -- they are compressed, but still available. When we move the image back, we can get the same image we started with:
|
Brightened Image after Curves Used in Opposite Direction
|
By contrast, if we look at a traditional 'exposure' curve, we can generate something similar to the bright picture above:
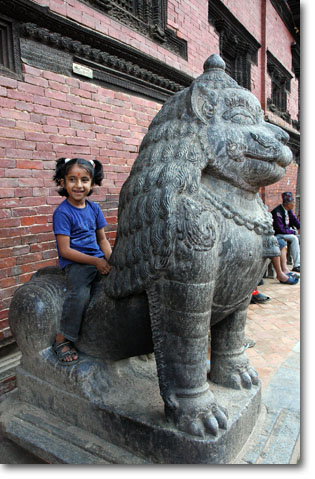
Similarly for black points:
Original Image (Image Credit: "Playful lion rider, stone shrine guardian, Kathmandu, Nepal" by Wonderlane) |
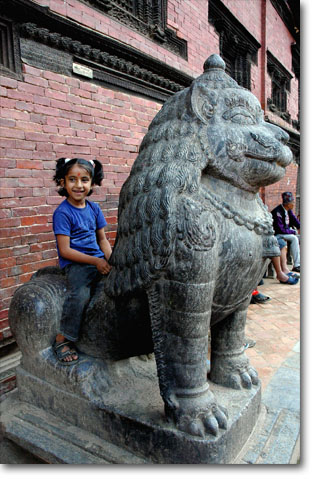
|
Image Grounded with Sagelight Curves
|
|
Image After Sagelight Curves Applied in Opposite Direction
|
The data was restored in each image because it was never lost. It was compressed in the histogram for each image, but Sagelight was able to recover it. Since Sagelight Curves protect the highlights and shadows, you can work with them in a broader range where normally data would be lost. It's still good to be careful, but Sagelight's Curve technology makes it a lot easier to work with your image.
|
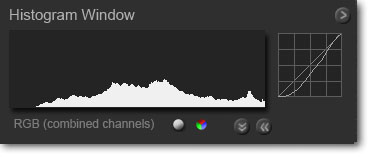
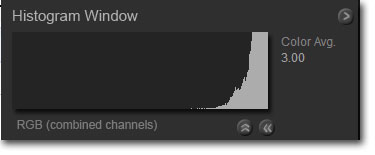
Histogram of Brightened Image
|
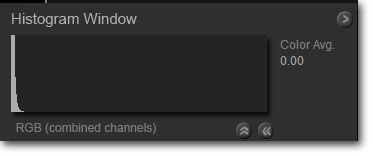
Histogram for Grounded Image
|
In most cases, histograms that have such sharp edges on the left and right signify data that is completely lost. But, as shown above, the data was basically completely recovered in each image. This is because much of the data was contained in the very last slice of the histogram for each image -- on the left for the darkened image, and on the right for the lightened image.
The histogram only shows an 8-bit set of data. In the darkened image, for example, nearly the entire picture was contained in the first 8-bit line, with the rest contains in the next few lines. That is, since the data is 16-bits internally but it only takes 8-bits to represent the entire image, the data could safely stored in the first 16-bit pixel range (0-255) that represents the entire 8-bit range. This is why working in and saving out to 16-bits per-channel provides much more quality.
Of course, in the 16-bit sense there is some data loss, but these two examples represent extreme cases to show how the data is preserved when using Sagelight Curves vs. typical toning curves such as Exposure.