|
Quick Reference (Bokeh/Lens Blur Controls)
Hover the mouse over the circular tabs for a description of each function
 Main Help Button
Press this button to display all help available for the Bokeh and Lens Blur function.
|
 Shaped Auto-Mask Controls
This set of controls helps you shape the Auto-Mask, which is like a vignette in shape and appearance. The amount of blur is controlled by the shape of the mask. The Image Thumbnail (below) will show you the shape of the mask.
The Shaped Auto-Mask can help you keep areas from being blurred while creating depth of field or other effects in your image. It can replace creating a mask yourself, or aid you with a mask (selection or depth mask) you're working with -- user-drawn masks, highlight masks, and the shaped auto mask may all be used simultaneously.
In general, you can use the mouse to move the reticle on the image itself instead of using these controls. However, these controls can provide some quick real-time action, and the Softness and Bleed controls must be used here.
|
 Auto-Mask Radius
Set the Radius of the Shaped Auto-Mask. This is the same as grabbing the one of the reticle handles (overlaid on the image) and moving it manually with the mouse.
This will increase or decrease the size of the auto-mask. If elliptical, this will change the base radius. If rectangular, the base square size will change. When Dual Planar, the gap in the plane with shrink or widen. You can see the effect directly in the Image Thumbnail.
|
 Auto-Mask Softness
This will set the Softness of the Shaped Auto-Mask. This sets the edge of the mask to either very hard and edgy to very soft and unfocused.
For example, when using an elliptical shape, the blur is a solid ellipse when the Softness is 0. As the Softness is increased, the circle becomes more blurry outward (see the Bleed Slider control). This same concept is applied an all other shapes.
|
 Auto-Mask Width Multiplier
Sets the ratio of the Shape Auto Mask. It is better to simply grab the reticle to change the shape of the mask.
This slider allows you to change the shape of the mask to a non-symmetrical shape. For example, if the shape it circular, this will change the shape of the mask to either a wide ellipse or tall ellipse, depending on the slider setting. When the mask shape is rectangular, this will change the shape from a pure square to a wide or tall rectangle.
The same effect is more easily produced by simply grabbing the reticle handles and changing the shape directly.
|
 Auto-Mask Angle
Sets the angle of the Shaped Auto Mask. This is more easily performed by grabbing the reticle by one of the handles and moving it directly.
This changes the angle of the mask by rotating it. For example, if the shape is an ellipse, it will rotate the ellipse based on the angle. If it is a planar or dual planar the plane will rotate.
You can right-click on the reticle (or use the Control Key while using the left-click on the mouse) to change the angle of the mask without changing the general shape.
|
 Auto-Mask Radius Bleed
This allows the softness level to bleed inside the radius ring of the mask. When the Radius Bleed is set to 0, the softness extends outward from the radius (as defined by the reticle display on the image or image thumbnail).
The Radius Bleed slider will allow the softness to creep into the radius circle (whether elliptical, rectangular, or dual planar in shape) so that you can define a tighter radius. Without the Bleed Slider, it can be difficult to generate a blur inside of a very small mask area.
Use this in conjunction with the Softness Slider to have much more control over the general softness and blur level in your mask.
|
 Auto-Mask Shape Selection Buttons
These buttons will change the shape of the mask. In order, they are:
1. Elliptical/Circular. This will set an elliptical or circular shape for the mask. Defaulting to a circle, you can change the shape easily by changing the reticle on the screen.
2. Rectangular/Square. This will set a rectangle or square shape for the mask. This can be useful for getting a little more of and edge on the blur shape.
3. Planar. This will set a plane for the blur, where you can then move the edge of the plane around on the screen, as well as rotate it and change the softness level.
4. ^Planar. This is the same as the above 'Planar', and is simply reversed for ease-of-use.
5. Dual Plane. This sets a dual plane, with an upper- and lower-plane. This is great for title-shift and setting middle-ground in-focus areas.
6. Inverted Ellipse/Circle. This is the same as Elliptical/Circular, except that the blur is formed inside of the reticle. This can be useful for different distance effects, which as alleyways, for example. Use the Bleed and Softness Sliders for better control (in all inverted shapes)
7. Inverted Rectangle/Square. This is the same as Rectangular/Square, except the blur is formed inside the rectangle. This can also be usefule for things like alleys or other places where you want to perform a blur between two objects (such as an alley, two buildings, etc.)
8. Inverted Dual Plane. This is the same as the Dual Plane shape, except the blur is formed as a hollow band. This can be very useful for the same types of effects as the other inverted shapes.
|
 Bokeh, Lens Blur, and Depth of Field Blur Controls
These controls control the actual blur and how it is formed. The amount (blur radius), Shape, Softness, and other controls can be changed. Also see the "More Highlight Controls" section.
|
 Blur Amount (Blur Radius)
This sets the amount or heaviness of the blur. The higher the amount, the higher the blur radius. Use this with the Shaped Auto Mask Softness Slider to control how the blur blends around the center of the mask.
note: Sagelight offers very high radius settings which can be very interesting, especially when using the highlight controls. However, keep in mind that when it is a shaped blur (as opposed to the Fast DOF mode), the rendering time can be fairly long, depending on the size of your image. Most Bokeh packages don't offer such large blur radius values for this and other reasons.
|
 Aperture Shape Softness
This sets the softness of the aperture shape. The aperture shape can be circular, square, hexagonal, as well as many other shaped. In some cases, the shapes can become very defined as the image is blurred, becoming very edgy.
Use this slider to soften the shape. Also see the "Specular Edge" slider.
|
 Aperture Shape
This sets the aperture shape. You can use a Circle, Square, Triangle, Hexagon, Octagon, as well as many other shapes.
Some shapes have solid, transparent, and graded versions, which can add realism (or just nice effects) to the result.
note: The transparent and gradient shapes are considered 'high-resolution' kernel shapes and can take longer to render when you press the Apply Button.
|
 Quick-Info Button
This shows a page of information with quick tips on using the Bokeh and Lens Blur. Mostly, this shows you how to increase the display speed, but also contains other information.
|
 Aperture Shape Angle
Change the angle of the aperture shape. When you have a non-circular shape, this will change the angle. For example, with a triangle, this will rotate the triangle. With a hexagon, this will rotate the hexagon -- which can give a more realistic effect if you don't want the shape completely aligned or perpendicular to the image.
|
 Specular Highlight Threshold
This sets the threshold level for the specular highlights. As the value becomes higher, less bright image areas are allowed to become highlights. The default level allows only the brightest areas to become highlights.
With a shaped lens blur (as opposed to the Fast Depth of Field), this will allow the highlights to come out in the shape of the aperture, which can add a nice effect and photographic realism to your image.
note: Use this with the Specular Highlights Strength. If you use the slider without setting the Highlights Strength, nothing will happen.
|
 Specular Highlights Strength
Set the strength of the specular highlights. This will cause the specular highlights to become brighter.
note: in many cases, the highlights will become washed out very quickly. Use the "Color Edge" slider to help control this. Also use the Highlight Mask to define your highlights.
|
 Pre-Blur Backlight
This sets the backlight level before the blur is applied. This is particularly useful in helping bring out the highlights. Since it is performed before the blur, the highlights will come out more effectively.
The backlight slider can help create nice contrast in your image and focus the foreground, as well.
The backlight use performed by using the Auto Mask area, so it typically fits in very naturally to the image. However, in some cases, where the backlight value is very high or low, you may see a halo effect. When this happens, either change the softness/bleed level, or consider using the Vignette Function in Sagelight after you've performed the blur.
|
 Fast Depth of Field
This sets 'Fast Depth of Field Mode'. This does not use a shaped blur, and is an order of magnitude faster to use than the shaped blur. This is generally useful as a softer blur, but also can be used when you are defining your mask. For example, switch to the Fast DOF mode when working with the mask shape or editing the mask interactively -- this will increase the display speed significantly.
Then, once you have more of your shape or mask defined, switch back to the slower aperture shape (if you are not using the Fast Depth of Field for its blur type).
|
 Extend Fast Depth of Field Range
This basically double the range when using the Fast Depth of Field, which can provide a very deep blur level.
|
 Fast Depth of Field Box Blur
This changes the Fast Depth of Field to a simple box blur, which can have an interesting effect. This is basically the same as using a square Aperture Shape rotated at 45 degrees, and with no highlighting. However, it is also much faster to use and to render.
|
 Main Controls / More Controls Selection
This button switches between the Main Controls and the "More Controls" Panel. You can also undock the "More Controls" Panel to work with both sets of controls more easily.
|
 Cancel, Reset, Accept
Cancel. Cancel the changes and don't apply them to your image. The Bokeh/Lens Blur (and Fast Depth of Field) function will remember your settings (including the mask), so if you return to the Bokeh/Lens Blur function, your last settings will be restored. You can also load the last settings (via the Load/Save Preset button) if you want the same settings returned.
Reset. Resets all controls to their initialized state. If you came in with a restored setting, this will reset all controls to their initialized state and not the restored state. Use the Load/Save Preset button and
reload the last known settings (an option in the files list) to restore the previously 'restored' settings.
Accept. This applies your changes. With large blur radius values (and when not in Fast Depth of Field Mode), the render can take a while if you're image size is large.
|
 Undock Image Thumbnail Window
This will undock the Image Thumbnail window and place it on your screen. This is useful in two areas:
1. When the thumbnail window doesn't fit on your screen when docked.
2. For ease-of-use. You can move the reticle in the image thumbnail, which includes moving it out of the bounds of the window (which you can't do in the larger image window). Undocking it can give you more range in moving the reticle.
|
 Save or Load Preset
Save or Load a Bokeh/Lens Blur Preset.
When Saving, this will save all active masks (selection or highlight mask) as well as all settings. You can then load these settings at a later time to restore the exact settings that were in place when you saved the preset.
When loading a preset, note that masks are saved even if they are not active. However, they are not set to active when the preset is loaded, even though they are stored. Check the "More Controls" Panel -- if the "Enable Mask" option is available (i.e. not grayed out) for the Selection or Highlight Mask, this means that either a mask was loaded but not highlighted, or an existing mask is in place and there was no mask in the preset.
Press the "Enable Mask" to enable the loaded mask, if necessary.
If you have an active mask enable, but there was no mask in the preset, this will turn off the current mask (highlight and/or selection mask), but will not remove it. Simply press "Enable Mask" to get it back. Sagelight may turn the active mask off (when there is none in the preset), since the preset is specifying there was no make.
If there is an active mask in the preset, but it is not the same size as the current image, all settings will be set as per the preset, but the masks will not be loaded (they are ignored).
|
 "More Controls" Tab
This opens up a number of other controls in the Bokeh/Lens Blur function, such as post-process controls and masking controls.
|
 Post-Process Controls
This section has a number of controls you can use to control the result after the blur. These controls don't affect the blur itself.
|
 Add Color (Overall, Entire Image)
This slider adds saturation (or vibrance) to the entire image. This can make your image look much more colorful, especially if specular highlights were added . Alternatively, you can lower the color to create a pale effect, which can also look nice in conjunction with a lens blur.
|
 Add Color (Auto-Mask Vignette Area Only)
This adds or removes color (saturation or vibrance) from only the Shaped Mask area. Sometimes it is very useful to add or remove color from just the shaped mask area. Between the other saturation slider and this one, you have a lot of control over how the color is applied to the image after the blur.
For example, you can remove color from the blurred areas (i.e. non-focused area) to add focus to the blurred area. Also, the blurred areas can sometimes "burn out" with alot of color. You can use this slider to draw back on these areas while adding color to the focus/non- or less-blurred areas.
|
 Add Color as Vibrance (instead of Saturation)
When checked, this causes the Add Color sliders to add or remove color as Vibrance instead of Saturation.
When as Saturation: This uses "Sagelight RGB saturation", which provides a deep, colorful saturation.
When as Vibrance. This uses "Sagelight Vibrance:, which can bring out brilliant colors in your image. Also, when you use it in the negative direction, this can have interesting de-coloring effects,.
|
 Image (Lens) Distortion
This slider acts as a lens distortion, and is just for effect only. It is more useful when the subject is centered. Note, however, the center of the distortion is the center of the Shaped Auto Mask. You can move the mask around on the screen to see this lens distortion change in realtime.
When you have specular highlights, the effects can be even more interesting, as it will warp the shape of the highlights. This is a good place to experiment with the Lighten/Darken, Backlight, and Add Color Sliders.
|
 Image Spin
This will spin the image based on the shape and size of the Shaped Auto Mask. It is for effect only. As with the Distortion Slider, it works better of the subject is more-or-less centered in the image; the center of the spin is defined by the center of the Shaped Auto Mask.
|
 Lighten/Darken Auto-Mask/Vignette Area
This is the same as the Vignette function in Sagelight, thought it is just a subset. You can use this to apply a vignette after the blur is performed. Some notes:
1. The vignette is applied to the Shaped Auto-Mask area. This typically aligns naturally with the blurred areas. However, with large settings you may see halos. Use the Sagelight Vignette function instead, as this is the same function -- the function inside of the Bokeh/Lens blur makes it much easier and more convenient, but only provides a subset of the functionality of the Sagelight Vignette function. Also, you can define a separate masked area with the external Vignette function, which can blend more naturally in some cases.
2. This is useful to help add contrast when you are using specular highlights. Also use the Backlight Slider, which will control the highlights more aggressively by performing the vignette function before the blur is applied. The Backlight function is the same thing as using the Lighten/Darken Slider in Hard Burn Mode (except it is performed before the blur)
|
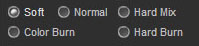
 Light/Darken Light Modes/Styles
This sets the styles of the Lighten/Darken Slider, which are the same styles available in the Sagelight Vignette Function.
1. Soft. This sets a deep, but soft lighten or darken style. It blends very naturally into the image and is the default.
2. Normal. This is the 'normative' vignette mode, and darkens or lightens the image in a plain manner.
3. Hard Mix. This lightens/darkens the image in a more aggressive style, but not as deep as other modes.
4. Color Burn. This brings down (or raises) the light in a very harsh manner. This will bring some of the color with it, so look for color flaring.
5. Hard Burn. This is a very aggressive mode and can look great. However, it brings a lot of color with it, so watch for color edging and flaring. This is the same mode used in the Backlight Slider, which can help ease color problems since it is performed before the blur (so the color edges are blurred out).
|
 Dock/Undock "More Controls" Panel
This will dock or undock the "More Controls" Panel so you can use all controls closer together. This is particularly helpful if you're using highlight controls, since they are split among two panels.
|
 Mask Controls (Selection and Highlight Mask)
This contains the masking controls for the Bokeh/Lens Blur function.
It is important to note that some controls act differently, depending on whether you have the Selection Mask or Highlight Mask set. The Lens Blur/Bokeh function has two masks you can use,
Make sure to know which mask you have selected.
|
 Select Mask Focus (for controls beneath these buttons)
Determines the currently selected mask. This tells the Bokeh/Lens Blur function which mask will be used with the controls just underneath it. When you select the mask, the controls will change to the last settings for the currently-selected mask. For example, "Enable Mask" will enable or disable the mask that is selected above, without changing the status of the other mask.
The above is just to keep space clean in the image, and is the same as if the controls were simply repeated in separate sections.
Mask Types:
1. Selection Mask. This is the main user mask that you draw, and can be used elsewhere in Sagelight.
2. Highlight Mask. This is the highlight mask that you define in the Bokeh/Lens Blur to control highlights.
|
 Enable (or Disable) Mask
This enables or disabled the mask (whichever one is selected in the Mask Selection area). If you have a mask defined, unchecking this button will ignore the mask when calculating the blur.
note: When you come into the Bokeh and it loads the last settings, it will not reactivate the mask even though it will load it (if it exists). Sagelight doesn't know what you've done since you left. So, you must check "Enable Mask" to re-enable a mask (Selection and/or Highlight masks) if you re-enter the Bokeh function and had a mask that was previously enabled.
Also, when you load a preset, sometimes a mask may be loaded but not enabled (for example, if it was not enabled when the preset was saved). If this checkbox is not grayed-out (i.e. actrive), this means a mask is loaded in memory, but not necessarily active.
If you load a preset that does not have a mask, but have a mask displaying, the mask will be disabled since the preset specifies no mask. However, the current mask will not be deleted. You will need to check this box to re-enable the mask.
|
 Invert Mask (Selection Mask Only)
Selection Mask Only: This will invert the mask, so the blurred areas will not be blurred, and vice-versa.
|
 Show Mask (overlaid on image)
This will show the mask as a black-and-white image over the image. This will allow you to see the shape of the mask and get a reference for how the blur is (or highlights are) being applied. When you choose any other control or move the mouse on the image, the normal image will return.
|
 Apply Mask as a Selection Mask
Selection Mask Only. By default, the selection mask is perceived by the Bokeh/Lens Blur as a depth mask. The more defined the mask is (i.e. the heavier the mask pixel setting), the more the blur is applied to that area. For example,. if a mask pixel is completely white (or red, as in the case of the mask editor), the blur will be 100% of the amount set in the Blur Amount slider. As the value approaches 0 (i.e. as the mask feathers outward), the blur radius starts to go to zero, as well. This is how the blur gets nice, natural effects as opposed to sharp edges.
However, sometimes this can cause problems with high blur amounts, and it also requires masking to sometimes be more accurate.
When checked, this sets "Selection Mask mode" (as opposed to Depth Mask mode), where the masked areas are turned into a layer that is feathered on top of the blurred image. This causes Sagelight to blur the image, and then puts the masked area on top of the blurred image as a layered selection.
This allows images to blend/feather back into the image more naturally, especially with a large blur radius. This can also mean you don't need to be very precise with the mask.
Experiment with this control, as it can help make masking much easier.
|
 Lazy Mask Switch
Selection Mask Only. This tells the Bokeh function to blur the image but not protect the masked area. The net result is that the image will blur inward into the mask. This means that you can then use the Undo Brush to put back what you want to keep in the image.
This is very similar to "As Selection Mask", except that it doesn't put the mask back.
This function is useful because you can then use the Undo Brush to put back the areas you want to keep in an environment where you have much more control that is also much faster.
The added value is that you can create an extremely sloppy mask very quickly without worrying about edges -- as long as you overlap the edges of the masked area slightly, you can then worry about the details later on.
Try this: loosely define a mask very quickly, get something that look close to what you want, then turn this option on. Then use the Undo Brush to put back what you want to keep. It can go much more quickly than using the normative mask process.
|
 Clip Mask Edges (default)
Selection Mask Only. This tells the Bokeh/Lens Blur to not protect edges in the mask. By default, the edges are clipped. This means that the edge areas defined in the mask are not considered for the blur in the non-masked areas. Typically, this is better. However, this can create tight edges (which is also typically what you want). In cases where you don't want the edges so defined, uncheck this box.
An example where this is useful is when you are blurring a foreground item. Blurred items in the foreground don't have sharp edges, and checking this box will help keep the edges blurry. In most cases, you are protecting foreground areas and want to clip the edges. For other cases, uncheck this option to blur the edges.
|
 Edit the Mask
Press this button to edit the mask.
Selection Mask: This is the same mask you edit elsewhere in Sagelight. You can also load a mask.
Highlight Mask: This is specific to the Bokeh/Lens Blur. Edit this mask by marking the area you wish to save. Every area that is marked in each session will "freeze" the current highlight strength, Color Edge, and Highlight Threshold amount. When you press "Accept" any changes you made will now not change as you move the these sliders. This allows you to very specifically define highlight area that otherwise might wash out, become too bright, or run together.
|
 More Highlight Controls
This section contains more controls to work with the specular highlights. Sagelight contains many controls to work with the highlights because they can be very effective in your image, and can be even more impressive when these controls are used.
|
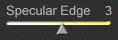
 Specular Edge Slider
This sets how edgy the highlights will become. As the value increases, the specular reflections become more pronounced and look like the aperture shape. They also become bright. Use the Higlights Strength and Color Edge sliders to ease back the brightness. This can tend to look unrealistic, but can also provide for some interesting effects.
As the slider is moved to the left, and values decrease, the Highlights Threshold and Highlights Strength slider may need to be increased. When values are 3 or less, the image tends to look much more realistic, as the specular highlight blend more smoothly with the image while retaining their shape -- they look more natural.
Also use the Backlight Slider to help control how the specular reflections change when using this slider.
|
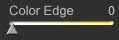
 Color Edge Slider
This controls how bright or white the specular reflections will become. When set to 0 (default), specular reflections are bright and become white very quickly. As this slider is moved out (you may need to increase the Highlights Strength), the reflections start to take the color of the background, which can look much more natural and colorful. This is one of the items the 'freezes' when you use the highlight mask.
In some cases, the reflection color will not change -- this is when the background color is already white.
A larger value (or sometimes just a slight value) can make the image look softer and more natural.
|
 Highlight Clip Slider
This slider clips the highlights from the top. The Highlights Threshold slider tells the Bokeh function how low the brightness should be to consider a value a highlight.
The Highlight Clip Slider tells the Bokeh function to start discounting the top values, so the highlights end up becoming a range from the 'bottom' value set by the Highlights Threshold Slider, to the 'top' value set by the Highlight Clip Slider.
This can be used for interesting (and sometime's unrealistic -- i.e. artistic) results. For more realistic results, make sure the slider does not become too strong.
note: Sometimes you can find yourself with no highlights at all when using the Highlight Clip Slider and Highlight Threshold Slider together. This is because the bounds of the sliders are overlapping. When you use this slider and there are no values, increase the Highlights Threshold Slider until you see some values, then work with the Highlight Clip Slider once again.
|
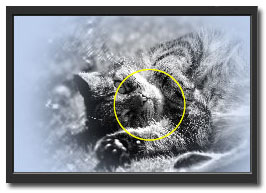
 Image Thumbnail and Mask Display
This shows the current Shaped Auto-Mask overlaid on the thumbnail of the image. It also shows the reticle, which you can move within this box (see next section).
You can undock this window for a better view, especially if you are working with a small screen size and the thumbnail (as docked by default) is scrolling out of the window view.
|
 Movable Reticle Display
The reticle inside the thumbnail image can be moved with the mouse. This helps for a couple reasons:
1. You can move the reticle without seeing the reticle on the image. When you move the reticle in the image, the reticle constantly displays, which, for some, may be distracting. By moving the reticle in the thumbnail display, you can get a seamlessly flowing view of how the image changes.
2. You can move the reticle off the screen, especially when the image thumbnail is undocked. Sometimes, it works to have the reticle move off the screen, so the softness, blending, and other factors of the blur (which can be wide-ranging) can work softly into the image -- the 'center' of the Auto Mask is technically off the screen. You can easily do this with the image thumbnail, by grabbing the reticle and just moving it outside the window. Due to Windows constraints, this is not easy (and sometimes not possible) when moving the reticle inside the actual image displaying on the screen.
|
|
|