|
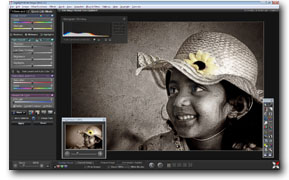
Screenshot 1
General Editing
This screenshot shows the
general editing environment in Sagelight. The
histogram, navigator, and toolbox are shown.
Individual toolboxes and windows can be hidden or moved
to other monitors to maximize space on the desktop. |
|
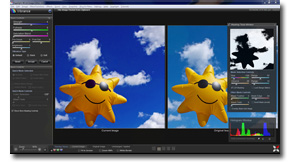
Screenshot 2
Selective Vibrance
This screenshot shows using the Vibrance function.
Vibrance adds deep color to your image. In this
image, everything but the sky is masked out (see the
mask window on the left). When the Vibrance is
added, only the sky color deepens, leaving the balloon
and clouds untouched. |
|
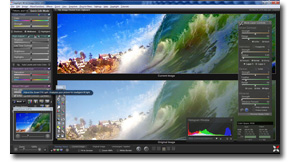
Screenshot 3
General Editing and
Vertical Split Window
This screenshot shows the
general editing environment in Sagelight showing a
before-and-after set of images, stacked vertically. |
|
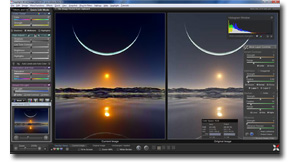
Screenshot 5
Using RGB and Color
Controls
This screenshot shows a
before and after image created using the RGB controls
such as brightness, midtones, and shadows to create an
image with a deeper contrast. The saturation was
then increased to add some color. |
|
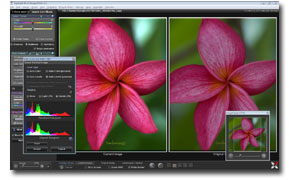
Screenshot 6
One-Click Auto Balance
This screenshot shows the
Auto Balance feature of Sagelight Image Editor,
including the dual histogram display and navigator. |
|
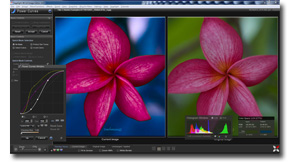
Screenshot 7
Vibrance Curves
This is the same image as
above, change with the Vibrance Curves. This
allows more selective color changes with deeper colors. |
|
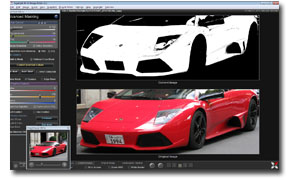
Screenshot 8
Quick Masking
This screenshot shows how the
red of the car is masked. The white area is the
area that is being masked. See the next screenshot
to see the results. |
|
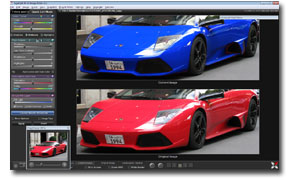
Screenshot 9
Effects of Masking
This screenshot shows the
results of the previous screen shot. The HUE was
changed to blue, but only in the areas masked.
Click on the image to see how accurate the detail is in
changing just the color of the car. |
|
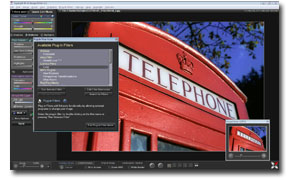
Screenshot 10
Plug-In Filters
This screenshot shows what
the Plug-In Filter display looks like. |